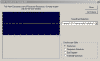
Sound Card Tuning Aid
The
Sound Card Tuning
Aid screen is accessible
from
the
AGWPE menu and can be used to "see" the
quality of received signals and, for HF packet
particularly, help in tuning the radio to the
correct frequency. At least one oscilloscope will appear on the
left side of the screen. A second scope below the
first only appears if you have selected
Dual Port use of the sound card on the
Properties screen.
This page describes the Tuning Aid and gives
some examples of good and bad signals as seen on the tuning aid's
oscilloscope.
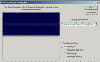
The first screen shot below shows the Tuning Aid
page with the sine wave view selected. Only one oscilloscope is
visible since the sound card is running in
Single Port mode. In Dual Port mode, another
scope would appear beneath the first. Note the sine wave in the
scope.
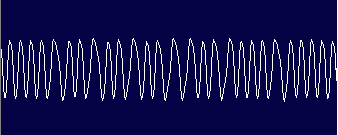
This is what a quiet 1200 baud packet channel looks like.
The only undulation in the wave is due to noise. It verifies that the audio connections
to the sound card and radio are working.
 <-- Click for larger image
In contrast, if the sine wave was perfectly flat
(or nearly so), as below, then you know you have no audio input from the sound
card, either because of a problem with the audio
feed from the radio or incorrect sound card
volume settings (source or volume):
 <--
Click for larger image <--
Click for larger image
Oscilloscope Styles
There are four (4)
display styles available for the Oscilloscope.
The first two are generally the most useful.
1. Sine Wave
--
shows strength of the signal
(audio volume) and the quality of the signal. A signal
with good strength will have waves that fill about
1/2 of the screen (relative distance between the
peaks and valleys of the wave). You can use the Volume Control settings for RX
audio to adjust
them.
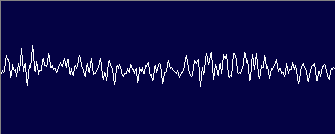
Signal samples for
1200 baud:
 |
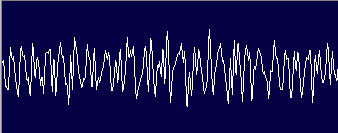
< Sample of a good
signal;
packet decoded.
|
|
Too weak or distant;
packet was
not decoded
|
|
Collision of packets;
packet was
not decoded
|
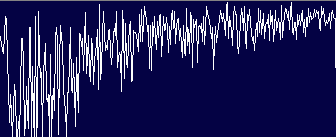 |
This is from a Yaesu FT209 transceiver with
"bass
boost" activated. The boost creates incorrect
pre-emphasis: the low tone is emphasized, not the high tone.
These packets can only be decoded about 80% of the
time. The sending station must turn off the
radio's bass boost
option to correct
this.
|
|
|
Below, a 9600 baud signal sample:
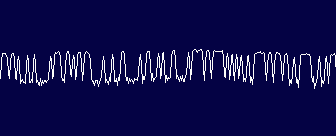
This is a generally good signal
that was decoded, but you can see small sparks caused
by some "bug" at either the transmitting station or
the receiving radio or sound card.
2. Waterfall
This is a frequency spectrum
display that shows
activity in the audio pass band over the last few seconds. Received signals
create color streaks which will 'fall' down the display
as time progresses. Relative
signal strength is indicated by the colors, which are
--
weakest to strongest -- blue, green, yellow, red.
Black indicates no signal.
The waterfall should be
centered between the two vertical white lines. For AFSK (UHF/VHF), it should center automatically. For
HF operations (FSK), adjust the radio's receive
frequency to center the waterfall. Centering is
critical for accurate decoding of HF packets. The
strongest signal (yellow/red color streak) must lie between those two lines,
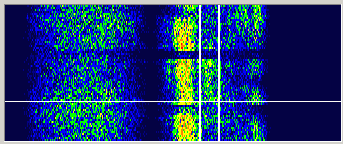
as this next screen shot illustrates:
The screen shot below shows an HF radio that needs
tuning. The yellow area showing packet activity is below the
tuned frequency marked by the two vertical lines:
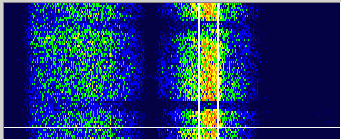
This sample below is a waterfall display showing two
1200 baud packets. The packets
have black areas to their left and right of
the two vertical white lines.
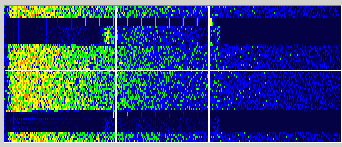
The upper packet has fair modulation and was decoded. Also, note
in the black
area above the packet that there are small green vertical
lines. This is the result of TXDelay, i.e. a
short interval of carrier
with no modulation.
The bottom packet has very low modulation (little color; similar to a carrier with no modulation),
but the packet was still decoded.
3. Eye
-
is really a scatter diagram. The closer together the
scattered points, the better the signal.
4. Frequency
- a real-time display of where
signals are being heard along a
frequency scale. The TWO white vertical lines are
centered around the dialed frequency, and the
majority of signal peaks and valleys should fall between the left
line (lower tone) and the right line (upper tone).
If they don't, you'll need to change the radio's
dialed frequency to center the signal between the
white lines.
Set Volume Button
Pressing this button
takes you to the Sound
Card Volume Settings window where you can adjust TX audio
levels, RX audio levels, and the RX input source jack.
|